
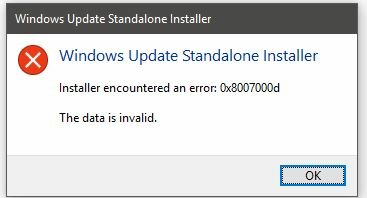
When you try to update Windows 10 or install any of the Windows 10 update and you get g Error Code 0x8007000d then this article will explain the possible solutions to get rid of this error.
Run- System File Checker
Just open – Command Prompt, head to Windows search option and there type – cmd and press the key – Enter
Once you find cmd just right-click on it and then choose to Run as Administrator.
Now just run the commands stated below one by one. You need to also press – enter after each command.
WSReset.exe
dism/online/cleanup-image/restorehealth
dism/online/cleanup-image/StartComponentCleanup
sfc/scannow
powershell
“Get-AppXPackage-AllUsers|Where-Object{$_.InstallLocation-like“*SystemApps*”} |Foreach{Add-AppxPackage-DisableDevelopmentMode-Register ““$($_.InstallLocation)\AppXManifest.xml”}””
Once you run all the commands above, restart the computer.
Try – Group Policy Editor
Open -Run Command Prompt, press – Win+R
In run dialogue box, type – services.msc and just press – Enter.
Select- Computer Configuration and next you need to choose –Administrative Templates.
Now, choose- System and then double-click- Specify Settings for-optional component installation & component repair.
Choose – Enabled & Contact Windows Update.
Click – OK
Restart computer
After applying these steps, now check for Windows updates.
Run -DISM tool
Open – Command Prompt along with admin privilege.
Right-click on logo of Window located at the bottom left corner and then select – Command Prompt (Admin).
In command box, run the commands mentioned below one by one and hit enter after every command.
“DISM.exe/Online/Cleanup-image/Scanhealth”
“DISM.exe /Online /Cleanup-image /Restorehealth”
Enter these commands without quotes
Now, reboot the system and now check if you are able to install the updates.
Utilize -Compatibility Troubleshooter
If the error exists while trying to install a particular driver, then it can be solved with the help of Compatibility Troubleshooter with specific driver. The steps given below are easy and can resolve the error
Open – File Explorer by pressing Windows + E simultaneously. Go to folder containing the driver setup file that you were unable to install is located.
Right-click on setup file, and then click – Troubleshoot Compatibility.
In Program Compatibility Troubleshooter, select- Troubleshoot Program.
On your next screen, select all the issues you are facing with your driver and hit – Next.
Select the older version of Windows where driver can work
Click – Next and select –Test the program
Run setup in a normal way and in case everything works fine then select –Yes, save these settings for this program in the end.
Utilize – Group Policy Editor
Open – run dialogue box, press – Win+R
In run box, type in – gpedit.msc and hit- Enter
Choose- Select Computer Configuration, then select – Administrative Templates
Select – System
Next, double-click -Specify settings to get the option – optional component installation & component repair
Select – Enabled and then- Contact Windows Update
Click – OK
Now, restart update.
So, you can get rid of this error using any of the above methods.